Since I've started hang gliding I've been thinking about shooting video and still shoots from the air. The hang glider is just so much more connected with the environment compared to a small plane - its such a better platform to capture to shear joy of flight. Luckily there are lots of exposed tubes to which a camera mount can be attached - at least on my single surface Falcon 2 wing.
The design requirements are pretty basic. The mounts needs to be light weight and robust to withstand my less than perfect landings (I'm still a Hang-1 at this time). It must be easily and quickly attachable/detachable without special tools - has to be done in the field after all. It needs to be adjustable so the camera can be setup to point in any direction.
Clicking on the photographs will load the much larger version, typically 1MB in size. So don't click unless you have broadband or a lot of patience.
 |
 |
|
The micro ball head from Manfrotto is what makes this project a piece of cake. It can support up to 2Kg (4.4lbs) which is more than enough for modern digital camcorders or cameras. A 3/8"-16 bolt can be screwed into the bottom of the unit. So the project is simply to work out a way to attach the 3/8" bolt to the frame tubes of the glider.
 |
 |
 |
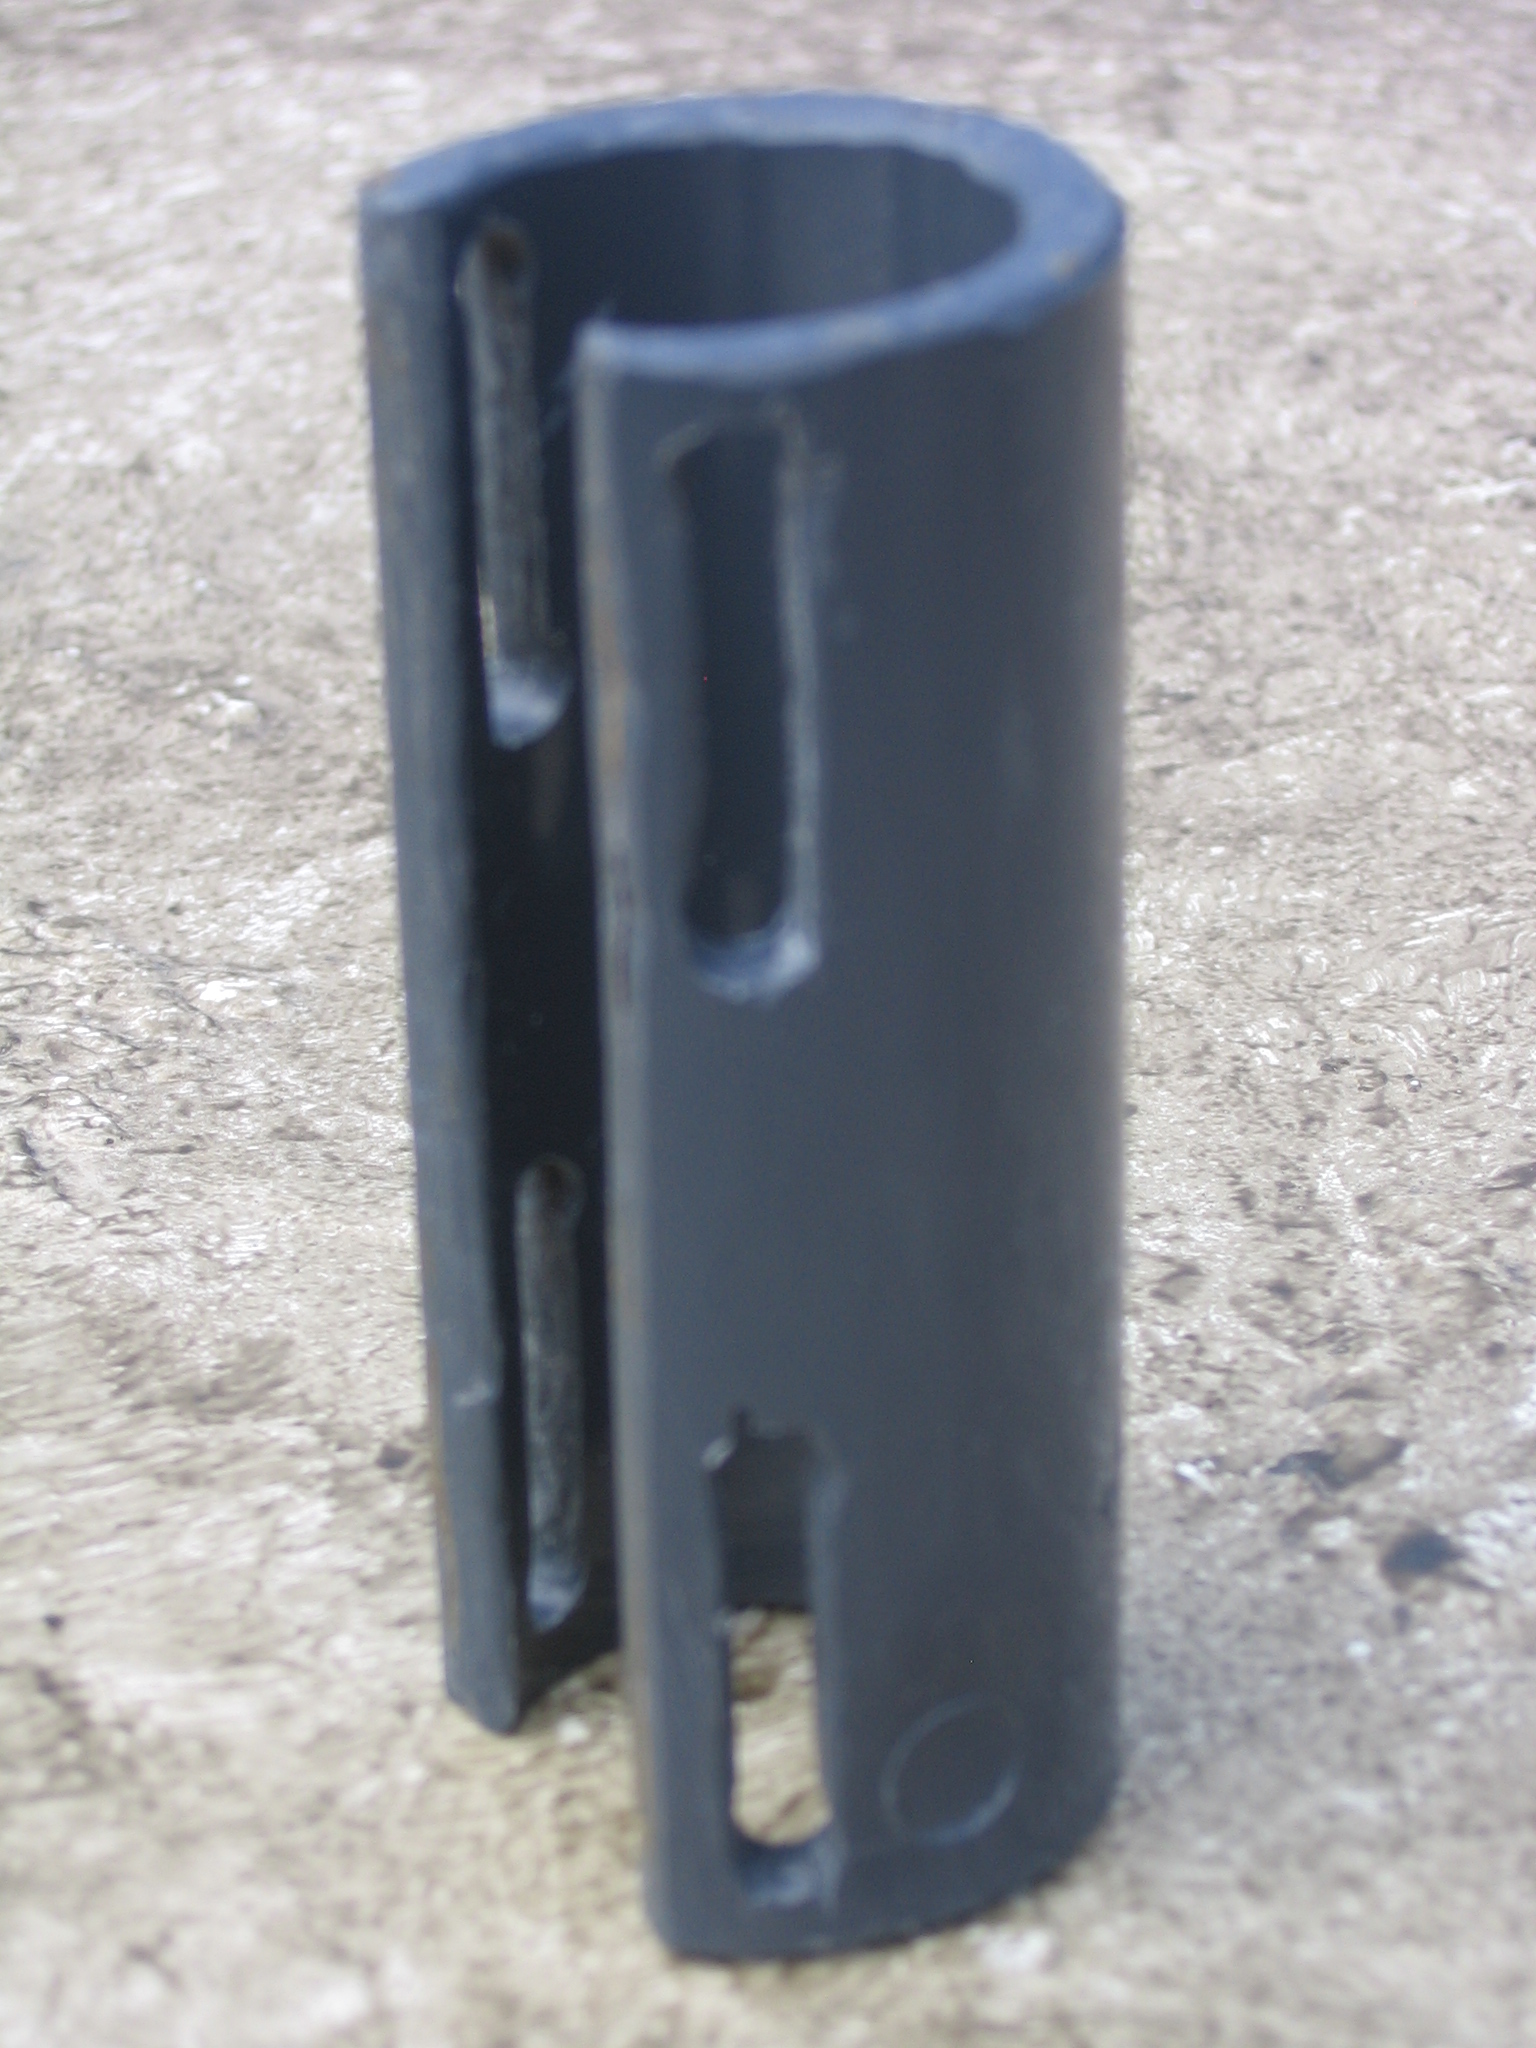
Camera Mount Body - Cut from PVC Pipe
|

"Plans" for pipe cut-outs (Shaded Areas)
The plans above show the cut-outs to be made into the PVC pipe. The rulers are in 1/10's of an inch. The red lines are guides to show where to make the cuts. You should imagine printing the plans above, cutting out the rectangle and then wrapping it around the pipe.
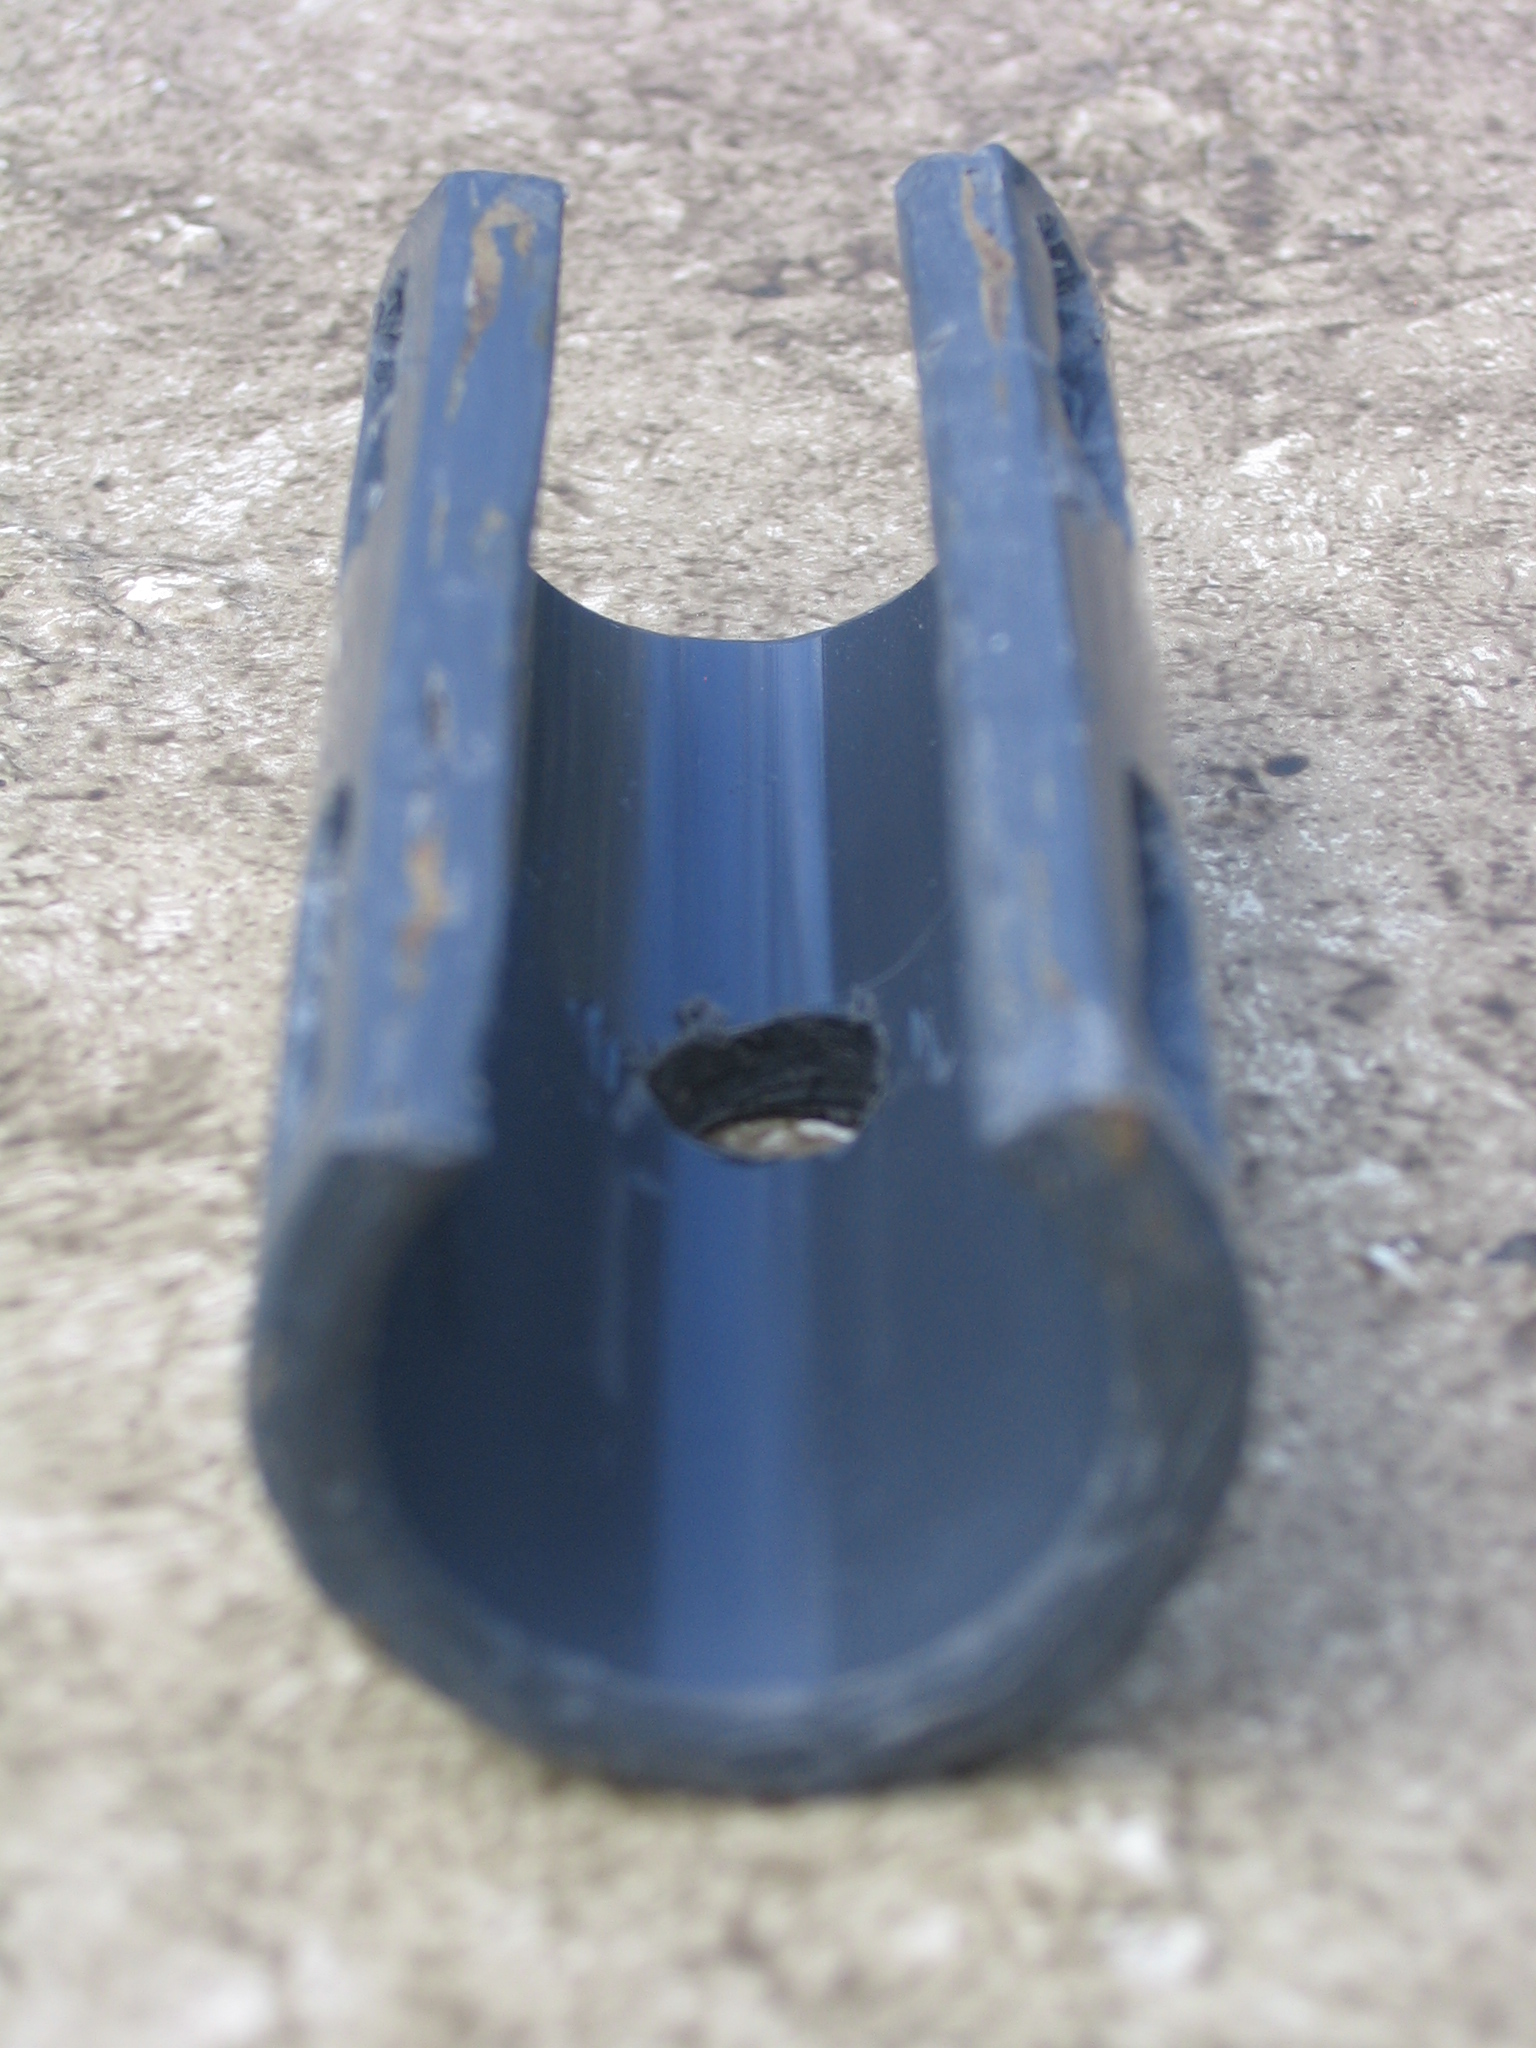
I'm not going to explain in minute detail how to mark out and cut the pipe according to the plans and pictures above. I assume that if you are smart enough to fly a hang glider then you can do it yourself. It is easier to work with the full 12" piece of pipe as it gives you something to hold on to - so I did all my marking, drilling and cutting of everything else and left the final separation of the 3" long body till the very end. I used a drill & 3/16" bit to make the 8 holes that form the ends of the strap slots. I then used a Dremel with a circular cutter to cut the straight parts of the slots and to cut out the top 1" wide section. Don't forget to cut the top section out at an angle to leave the edges with just a slight inward bevel. Some clean-up with a file and it was done. You can see from the pictures that I didn't kill myself getting it neat and pretty.
 |
 |
The nylon spacer fits between the micro ball mount and the pipe body. You can see above in the picture on the left an unmodified spacer next to one in which I ground out a curve on one side (using the Dremel tool with a sanding drum), the curve is supposed to match the outer curvature of the pipe. It was a bit finicky to grind it out, but I think the finished mount looks much better because of it.
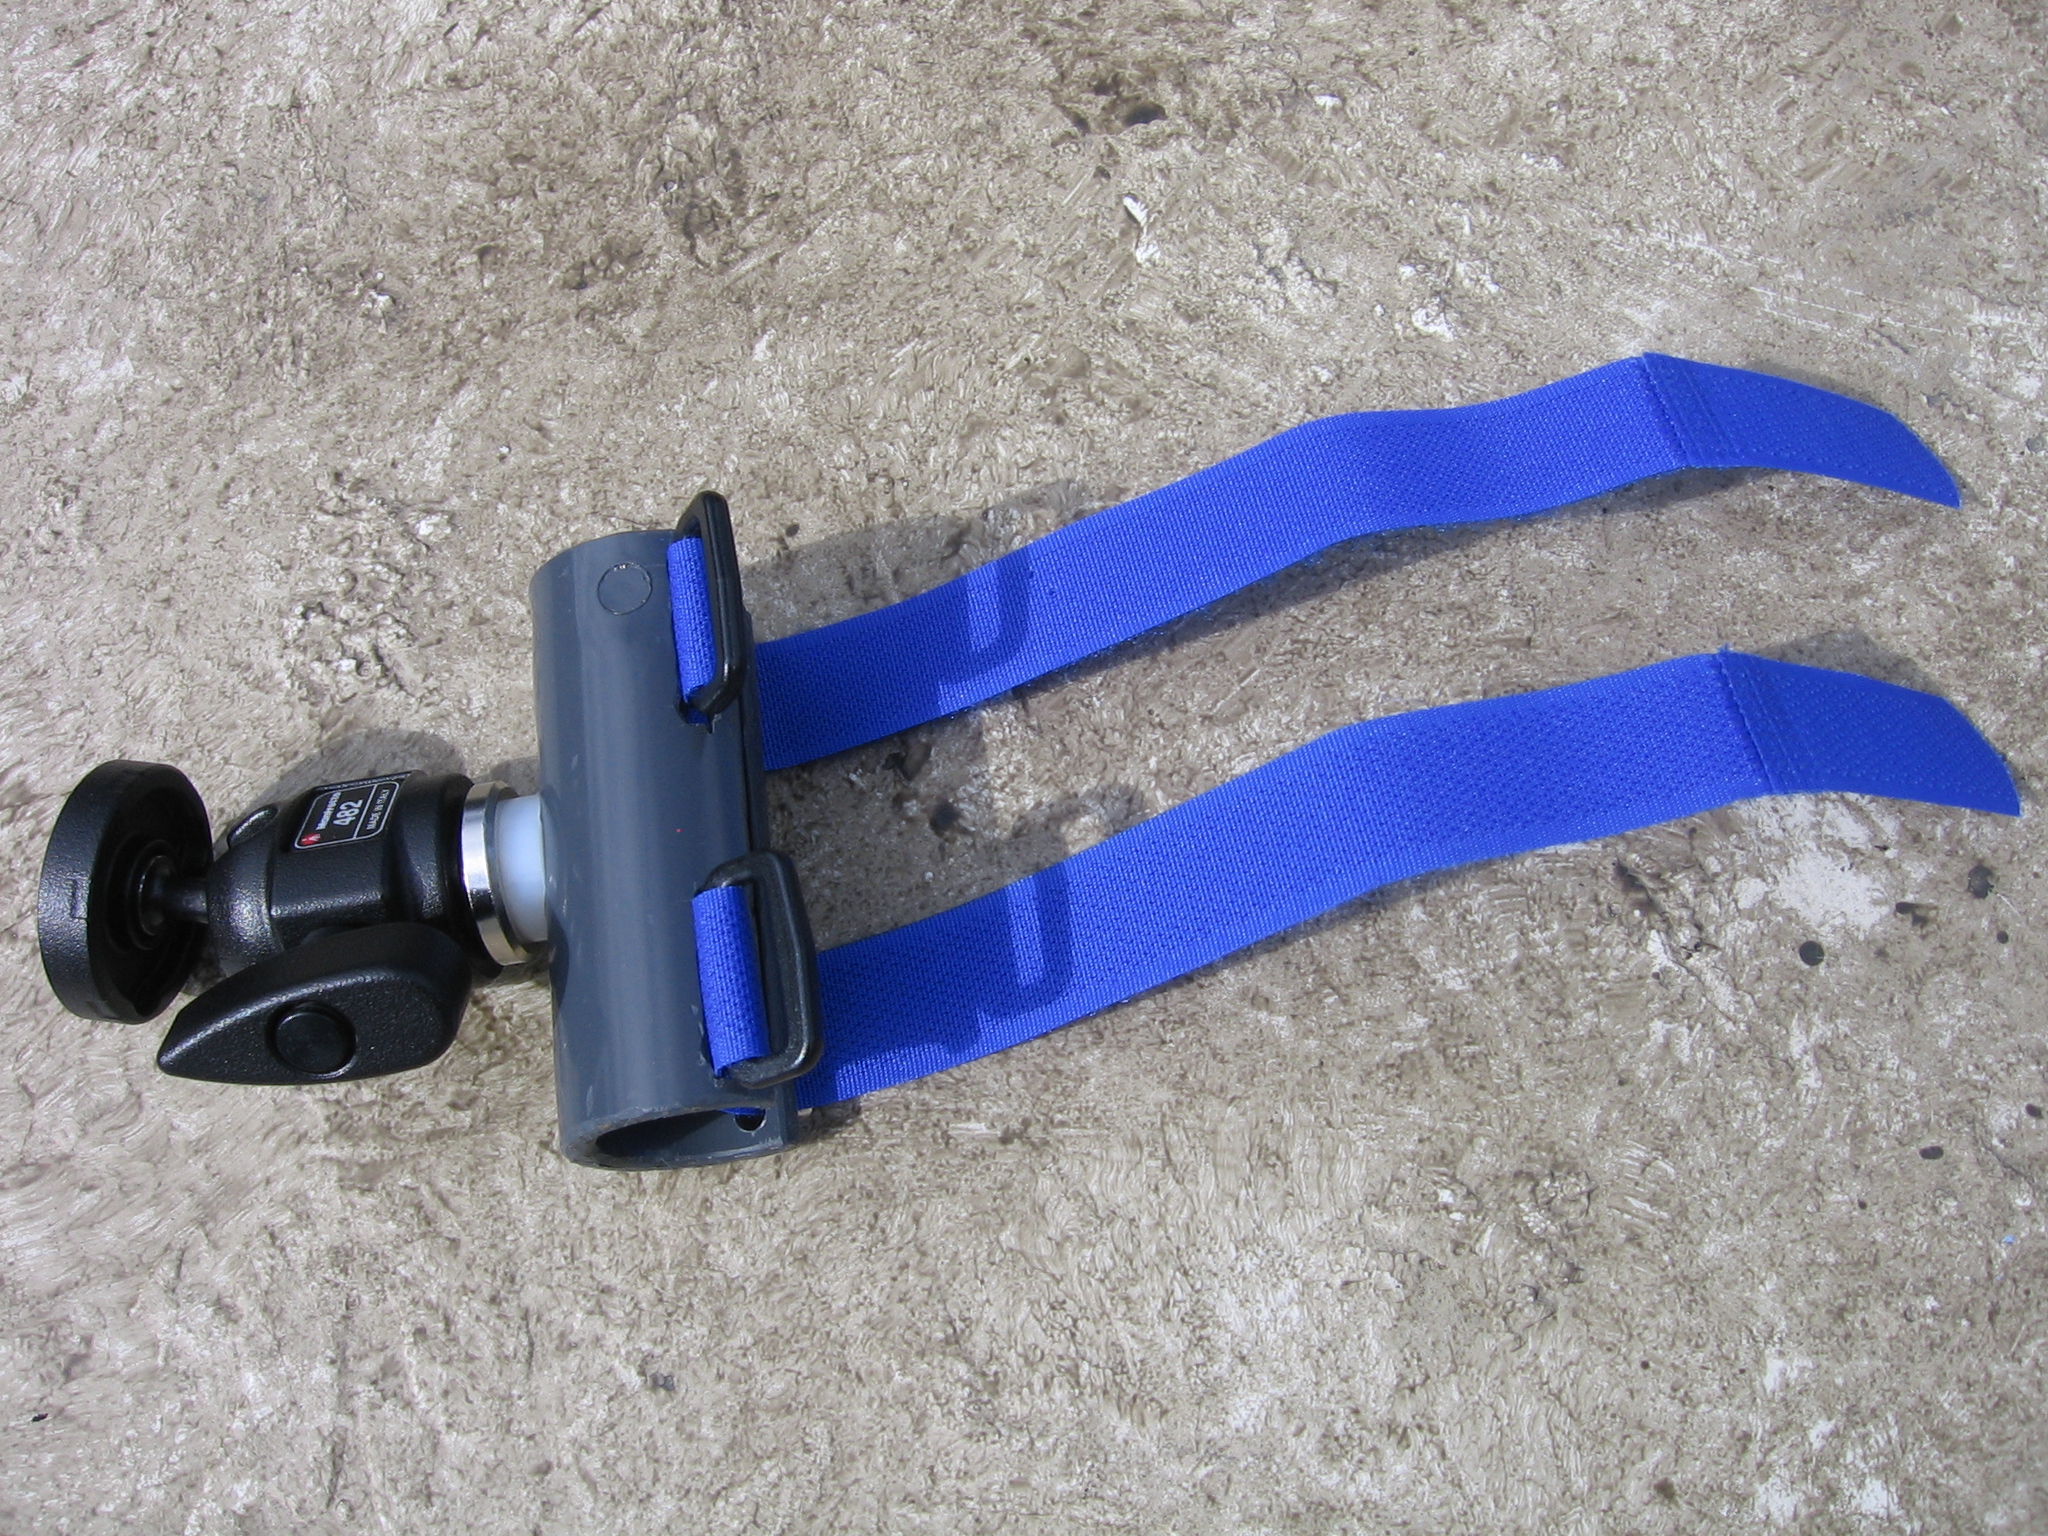
Finger tightening should be all that is needed to attach the micro ball mount to the pipe. The assembly should be obvious from the picture above on the right.
 |
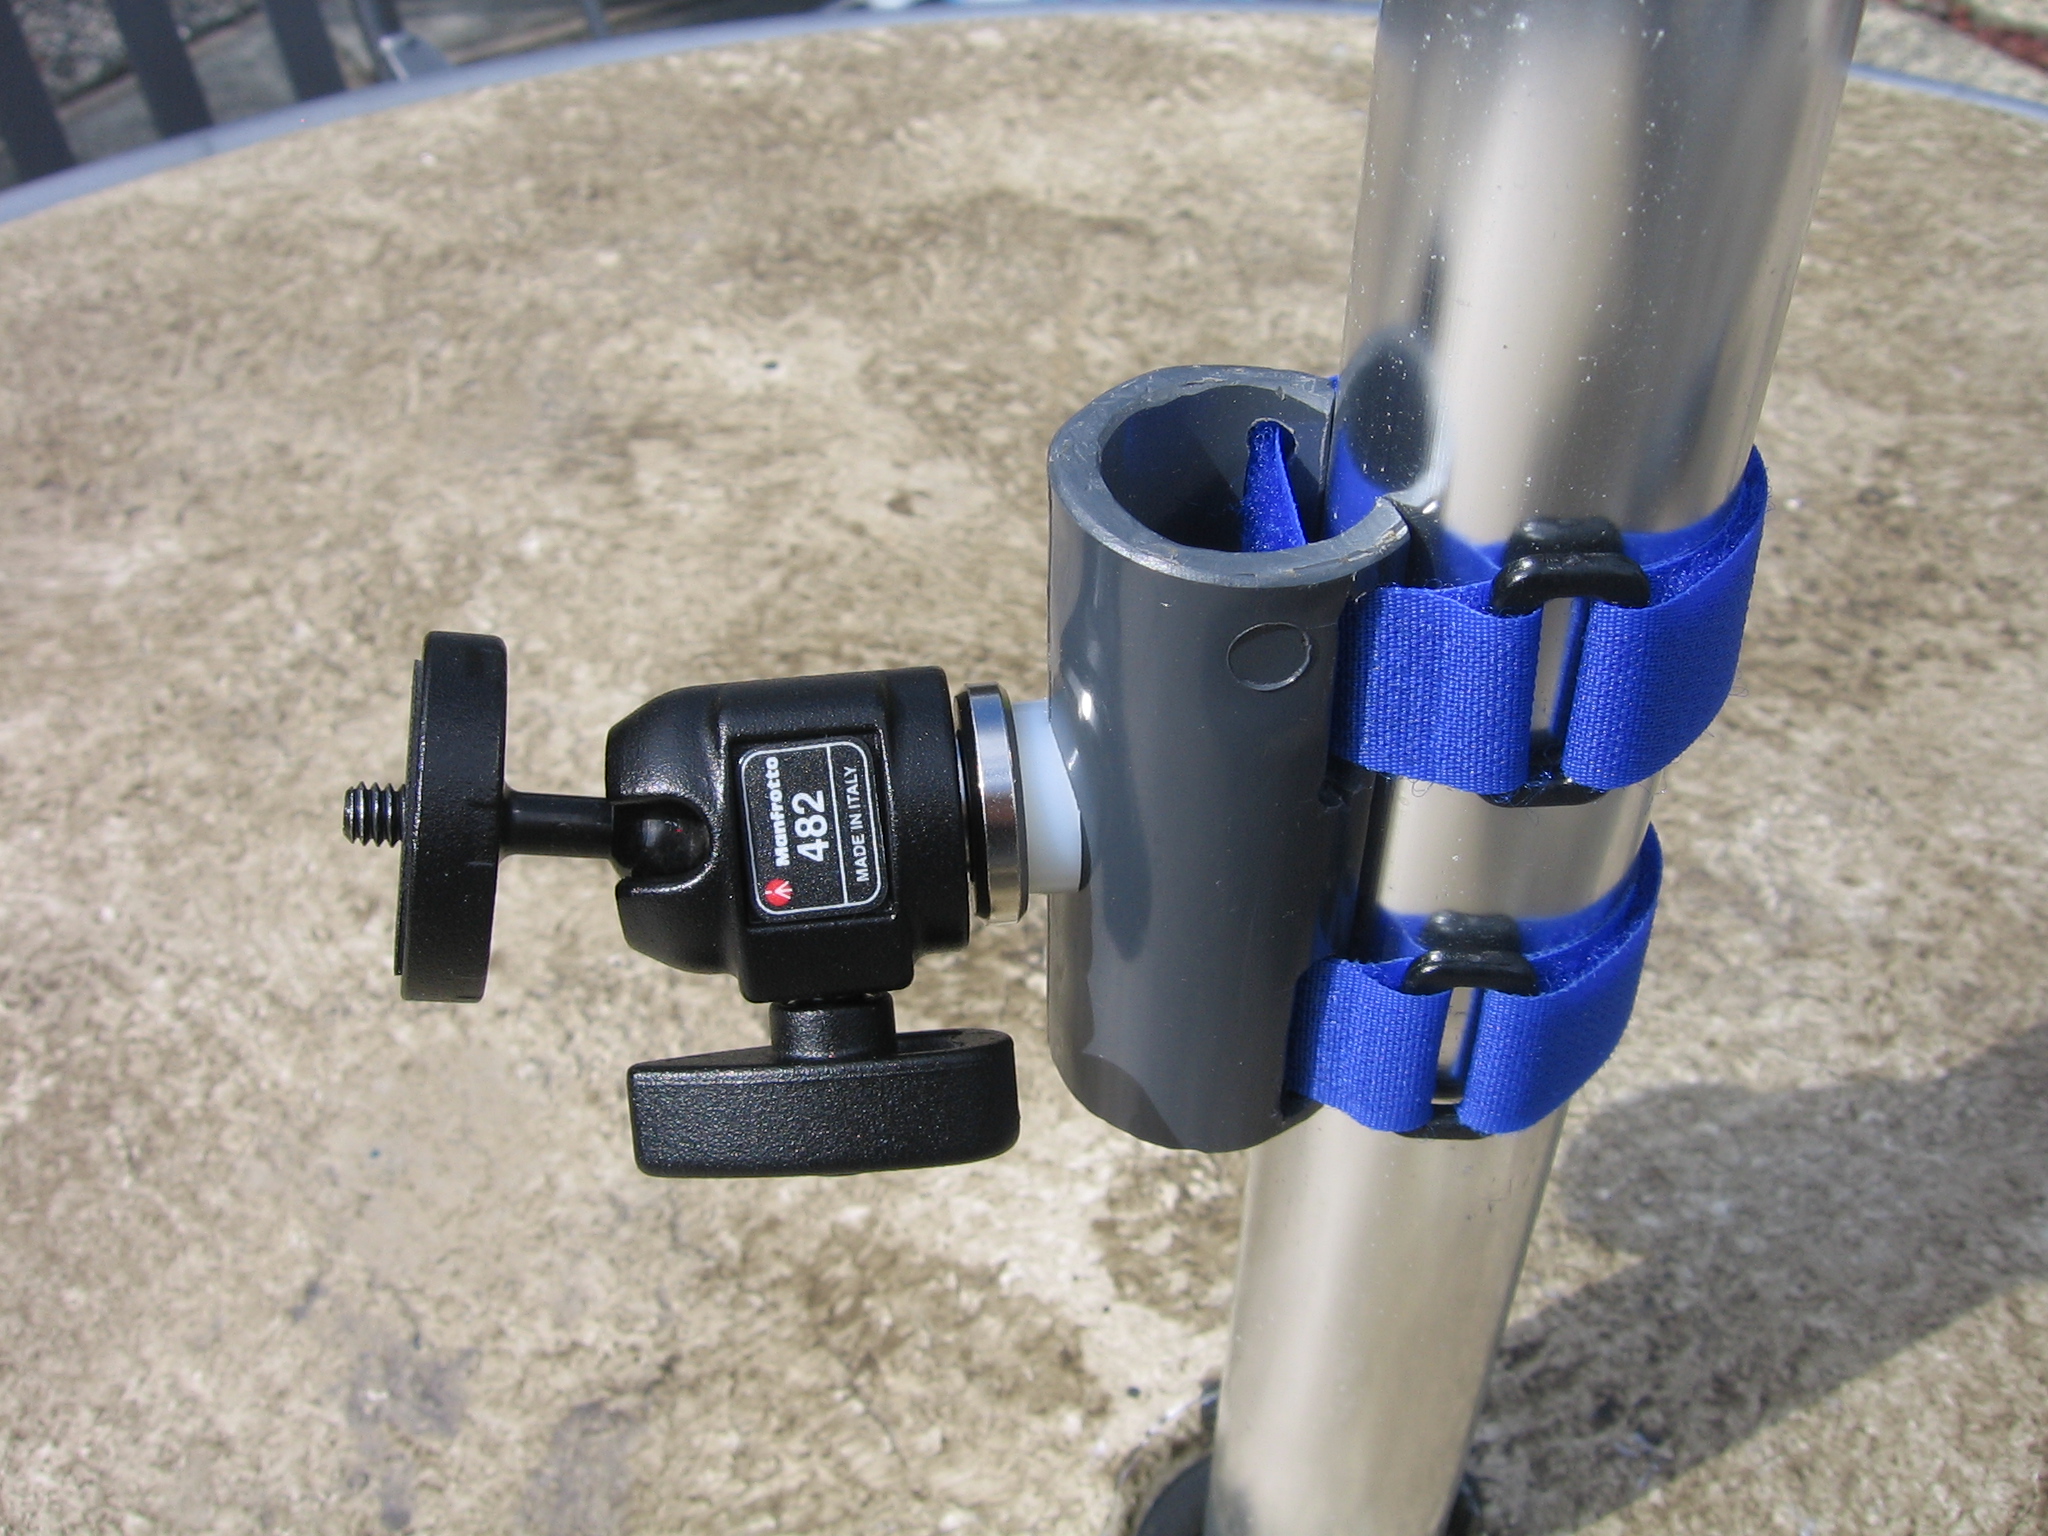 |
Thread the straps through the slots and your mount is finished. I found that the 8" straps work fine on the keel of my Falcon 2 and on my round base tubes. However you could use longer or shorter straps for thicker or thinner tubes or for the fancy aero-dynamic down tubes you see on more expensive gliders. If it ever stops raining in California (4/13/2006) , I'll be able to get out and fly and hopefully see how well this works in the real world.
Update 5/3/2006 - Revision 1.1 - Moving the camera further from the mounting tube
This modification was based on feedback from Soarem over on the HGPHOTOS yahoo group. Here is what he said after I posted a link to this page on the group.
Nice Job ,
Something else to consider is extending the reach of your Ball head by replacing your spacer with say a 4 inch piece of PVC piping and a longer Bolt....
I would also apply some rubber tubing over the edges of your cut away PVC to help reduce the rotation around the down tube... Also to speed up the assembly process consider skipping the time spent cutting the elongated holes in the pipe and just Rivet the Velcro straps in place like is done on a Vario Mount....BTW, you can also buy just a Vario Mount and Modify them for your purpose? I've attached flat alum stock with a Bolt to extended the reach for various projects... Ive also welded Alum Rods to them... The SKYs the limit.... Keep building..... Shade Tree Engineers R US 8-)
Soarem
 |
 |
Extending the reach of the ball mount is a great idea, it stops the mounting tube from interferring with the camera and also helps keep the tube out of the edge of the shot. You can see from the pictures above I got a 5" long 3/8"-16 hex head bolt. I cut a 4" long piece of 1/2" PVC tubing (from a 1/2" x 6" long Sprinkler System Riser) and used another of the Nylon spacers. I wrapped pipe tape around the bolt to center the tube on it. Screwing on the ball mount keeps it all together.
I still have to find the right rubber/PVC material to prevent the mount slipping around the tube. Its pretty solid but with the added "leverage" caused by the extension, it might be possible for the weight of the camera to twist the mount around. I actually like the slots cut for the straps as it means I can change the straps longer or shorter if the diameter of the tube changes significantly. And of course I don't have a rivet gun :-(. It was pretty easy to drill/cut of the slots - the work of a few minutes.
Another contributer to the HGPHOTO group, Ernie Camacho, points out that the 1/4" socket on the base of the camera is pretty weak and I'm finding this myself - the thread in the socket is threatening to strip out from repeated mountings to my glider mount. Here is a link to a mount he made that overcomes this problem quite nicely.
I flew with the the mount attached once so far, but wouldn't you know it the batteries in my camera died before I could get any shots. Oh well hopefully soon.....
Update 7/20/2006 - Some video shot using the mount
It turned out that my digital camera simply has no method for remote operation. So I decided to focus on video rather than still shots as this was my first interest anyway and there is no issues with triggering it - just start before you go and leave it run. The links below go to YouTube where I've been uploading videos.